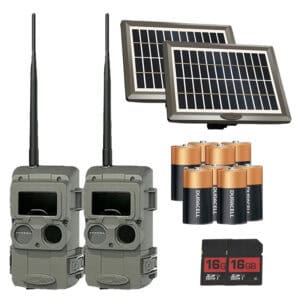
The Cuddeback PW3600 Solar Panel System is a game-changing accessory for anyone running CuddeLink trail cameras. Whether you’re powering a home unit or a remote camera, this panel delivers long-lasting, low-maintenance energy—especially when paired with the right battery setup.
In this step-by-step guide, we’ll walk you through what’s included with the PW3600, how to install it, how to verify it’s working, and how to add or replace internal batteries.
What’s Included with the PW3600 Solar Panel System?
When you purchase the PW3600 solar panel, you’ll receive everything you need for a basic install:
- The solar panel unit itself
- A tilt mount bracket to adjust the angle for optimal sun exposure
- A heavy-duty nylon strap for secure mounting to a tree or post
- A charging cable (brown) to connect from panel to camera
- An adapter for use with older Cuddeback camera models
These items cover the basics, but you can also add optional accessories like a second internal battery or a metal-armored cable for extra durability and wildlife protection.
Installation Instructions: Connecting the PW3600 Solar Panel
- Mount the Solar Panel
Use the included tilt mount and strap to secure the panel in a location with good sunlight exposure. Adjust the angle to face the sun for maximum charging performance. - Connect the Charging Cable
- Use the brown charging cable included in the kit.
- Plug one end into the solar panel and the other into the brown input port on your Cuddeback camera.
- If you’re using an older model, attach the included adapter before plugging into the camera.
- Verify Power Delivery
- If your camera has no internal batteries, it will immediately power on when connected to a working solar panel.
- This is the quickest way to test whether the panel is functioning properly.
✅ Pro Tip: Always test the solar panel before deploying it in the field.
Why We Recommend Solar for Home Units
While you can use solar power on any camera, the home unit works hardest in your CuddeLink network—sending and receiving images constantly. At Farmstead Outdoors, we always recommend placing a solar panel on your home unit first, as this will minimize maintenance and ensure your entire network stays online.
Adding or Replacing the Battery
Over time, internal batteries may degrade and require replacement. You can also add a second battery to extend field life, especially if you’re mounting panels in shaded areas or running year-round.
Here’s how to do it:
- Remove the Back Panel
Unscrew the seven screws on the back of the solar unit and gently remove the cover. - Access the Battery Compartment
Inside, you’ll find the battery clipped in.- Remove the existing battery if replacing.
- Plug in your new battery (or an additional one if adding).
- Charging the Battery
- Use a Cuddeback-compatible wall charger to fully charge the battery before field deployment.
- A green light on the charger indicates the battery is fully charged.
- Reassemble the Unit
Carefully align the fine threads when screwing the back panel on to avoid cross-threading.
🔋 We recommend using two batteries for heavy canopy coverage or remote setups. This ensures consistent power and reduces the need for field visits.
Optional Accessories to Extend System Life
- Second Battery: Double your run time with an extra internal battery.
- Metal-Coated Charging Cable: Replace the included cable with a squirrel-proof, chew-resistant version for greater durability.
- Cuddeback Chargers: Keep batteries topped off before deployment.
Summary: Why the PW3600 Solar Panel Is Worth It
Whether you’re running cameras in a high-traffic food plot or protecting a sensitive sanctuary area, the Cuddeback PW3600 Solar Panel delivers dependable power without the hassle of frequent battery changes.
When paired with smart setup (like two batteries and good sun positioning), the PW3600 can run for multiple seasons without needing maintenance. Some users have reported three or more years of uninterrupted use with proper solar exposure.


